Thursday, March 15, 2007

Rockin' Reversed Prints


After a few days of taking way too many x-rays, I'm back to stamping. And did you watch American Idol last night?! What was Brandon getting kicked off and Sunjaya staying all about?! Sometimes America does get the voting wrong. Oh well, there's always next week. I hope we can all agree that Diana Ross is still an amazing performer. She looks good for her age and she's still working the stage! FYI - I sent my text voting on Melinda and the Beat Box kid. Love them both!!

I love the colors orange and green and always seem to use them in my stamping. I stamped my image in pumpkin pie and then rocked it in chocolate chip. I backed the image in chocolate chip to draw you in to the pumpkin in the middle. I also stamped the floral bg stamp in pumpkin onto my pumpkin card for a soft background.

This card is an original by me and uses all SU! products.

Stamp sets - Reverse Prints and Floral BG

Ink - Pumpkin Pie and Chocolate Chip

Cardstock - Pumpkin Pie, Chocolate Chip and Summer Sun

Accessories - gold cord

Tuesday, March 13, 2007

Yippee - Spring is on its way!!


The weather today in Cambridge was absolutely gorgeous - 60 degrees and partly sunny! It makes so happy to think the cold air is just about over with. I guess that's what inspired me to make another card today.

Over at SCS, there is a daily challenge to help us stampers be creative and go outside of our comfy little boxes. Monday's challenge was to create a SCENE using kittie747 as our inspiration. Watercoloring is definitely not something I am great at, and making little scenes like these are definitely a challenge. This took a little time, but it was fun and worth trying. If you have never watercolored before, then go check out her gallery. The original card of hers that inspired me is here. I really hope you get inspired to make a watercolor card, it isn't all that hard!!

I created my card by drawing a tree with the pen side of my chocolate chip marker, used the mini palm tress from Balmy Breezes to make bushes and the leaves in the tree and then I watercolored everything in using my watercolor wonder crayons with a blender pen. I sponged bashful blue craft ink onto the chipboard piece.

All usedproducts are from SU!

Stamp sets - Basket Full of Fun, Balmy Breezes, Small Script

Ink - basic black, SU! markers(chocolate chip and garden green), bashful blue craft ink

Cardstock - certainly celery, bashful blue, naturals white

Rockin' Mixed Bouquet


I have already gotten bored with the polka dots template on my blog so I thought I would try something different. I may change this one, too, but for now we'll see how it feels.

I made today's card because I am always needing a quick thank you. I took the big flower from Mixed Bouquet and stamped it in Apricot Appeal and then I rocked it onto Only Orange. I distressed the edges of the confetti white with cutter's tool. I must have gotten some ink transfer from a previous workshop, because the stems on the side of the card should be apricot in color. Oh well, life happens. My favorite saying is "Life happens and then you get depends"! LOL! I have no idea where that saying came from, but has stuck with me for the last couple of years!!

This card is an original by me and uses all SU! products.

Stamp sets - Mixed Bouquet and Warmest Regards

Ink - Apricot Appeal, Only Orange, Close to Cocoa

Cardstock - Apricot Appeal, Only Orange, Close to Cocoa and Confetti White

Accessories - Orange grosgrain ribbon and cutter's tool kit

Sunday, March 11, 2007

New Week, New Technique - Rock 'n Roll


I had a really good weekend, which is why I chose to use Reason to Smile to start off this week's technique spotlight. Friday night's workshop was awesome! My hostess had 17 guests and over $600 in sales - my biggest to date! It ran fairly smoothly, which is what I am most concerned with. My uncle gets season tickets for the New England Revolution soccer games and was able to get us additional tickets to see David Beckham play against us in August!! Beckham retired from English premeire soccer and signed with MLS. Just to be able to get a photograph with him and his autograph costs $200! Are they crazy?! I know he's a superstar and all, but that seems a little much when alot of kids think soccer is their life. I'm considering paying that much for me and my little cousin to meet him, but I don't know because that is still a big chunk of change! On Saturday, me, my aunt and my godmother got together to spend about 5 hours scrapbooking. I completed 8 pages of mostly Christmas and winter stuff! Whew! I still have some summer happenings to work on, and then I can start 2007! Yippee!

Onto the Rock 'n Roll technique! All you need for this is two ink pads, one lighter and one darker, and a favorite stamp set. Try to use bigger stamps that are closed rubber instead of stamps that have alot of open spaces. That way, you can see the two colors better. Step 1, stamp your image completely in the light color first. Step 2 (top photo), roll the stamp's edges in the darker ink. Using the dark ink first and then rolling onto the light ink will cause an ink transfer that is hard to get rid of. Step 3, stamp your image onto cadstock and then piece together your card! Quick and easy with a little more color interest!

All products used are from SU!.

Stamp sets - Reason to Smile

Ink - Bashful Blue and Perfect Plum

Cardstock - Bashful Blue, Perfect Plum, Basic Black and Whisper White

Accessories - Soft Subtle brads, two-way glue pen, dazzling diamonds glitter

My Stamping Space - A Work in Progress!


I have been working hard at trying to come up with a solution to that mess of a basement since I first posted on this blog. I got the stackable cubes at Target that also include white boards to use as table tops. I liked that system, I only wish the boards were a little wider because I seem to lose table space. The tupperware containers hold all of my scrap paper. Each container is a color family and then I have three others for neutral, In Color and patterned scraps. The filing drawers on the bottom hold stamp sets, as well as the tall plastic containers. I have two tool boards that I got at Home Depot that I plan on hanging, I just haven't had time yet for that.

It's a work in progress, but the basement is so much more organized and clean than it was before!

Friday, March 9, 2007

Chalking a Bouquet of Flowers


Sorry I haven't posted in a few days. It's been a busy week - working and preparing for tonight's workshop. It's also Restaurant Week in Boston. My roommate and I both agreed to go to a restaurant we had never been to and try something new so we went to Aura in the Seaport District. The food was awesome! We both had the mediterranean-style swordfish and the baked oysters with andouille sausage. I had the maple ricotta cheesecake with concord grape sorbet for dessert. I was skeptical about the cheesecake, but I was trying something new and I really liked it! Dessert is always my favorite part of the meal, but the oysters were actually my favorite from last night. The service was also amazing, I would definitely recommend Aura to anyone visiting or living here!

So...onto the card I made for today. A friend's wife was just diagnosed with breast cancer and I thought to make her something simple and pretty. The roses are blended in baroque burgundy and rose romance chalks. All products used are from SU!

Stamp sets - Mixed Bouquet and Sincere Salutations

Ink - Basic Black

Cardstock - So Saffron, Bravo Burgundy, Always Artichoke and Very Vanilla

Accessories - Stampin' Pastels

Tuesday, March 6, 2007

Poppin' Pastels


Stampin' Up! publishes a little technique booklet for customers to receive with their workshop orders. It's a neat little booklet and helps us demonstrators to reinforce our own techniques. Since I'm showcasing stampin' pastels this week, I thought I would try the poppin' pastels technique for the first time. Can I just say WOW! It's a pretty cool technique and I can't wait to demo it at my next workshop!

Here's what you need to try poppin' pastels on your next project - a white craft ink pad or versamark pad, chalks, and sponge daubers. You can use any stamp set. First, I stamped my image in Versamark, then I used sponged daubers to apply color to the stamped image. Blow lightly onto your cardstock to get rid of any excess powder. Easy breezy and so cool!

I found a picture of my friend Heather's wedding tucked away in a box of other photos and decided to use that for my page. I covered their faces with a heart since I'm not really sure if they want to be plastered all over the net! I found inspiration from the 6x6 page in the technique booklet for my 6x6 page and used background stamps. In each project, all products are from SU!

Stamp sets - By Definition, Wonderful Words, Happy Hearts, On Safari, In the Wild and Quick Thinking

Ink - Versamark, White Craft ink, Cranberry Crisp, Pretty in Pink, More Mustard and Chocolate Chip

Cardstock - Naturals White, Cranberry Crisp, Blush Blossom, Pretty in Pink, More Mustard and Chocolate Chip

Accessories - Pink gingham ribbon, Earth Elements brads, ticket corner punch

Monday, March 5, 2007


I must have been in Florida when I wanted Balmy Breezes because I haven't used it much since geting this set. It was one of those stamp sets that you ooh and ahh over, then you get it, mount it and put it on a shelf to collect dust. I really did like it when I wanted it (8 months ago!) and decided to pull it out just for this week's technique spotlight. So, of course, I stared at it for 6 hours trying to remember why I wanted it so badly. It looked like the perfect stamp set to watercolor or use chalks. And so I did what I do best - stalk SCS! I admit it, I am a stalker!! I always give credit, so I want everyone to look at these cards done by noblerubies and StamperSharon before giving mine any consideration.

All products used are from Stampin' Up!.

Stamp sets - Balmy Breezes and Sincere Salutations

Ink - Creamy Caramel, Chocolate Chip, Pumpkin Pie

Cardstock - Sahara Sand, Pumpkin Pie, Summer Sun, Naturals White

Accessories - Stampin' Pastels, Taupe grosgrain ribbon

Sunday, March 4, 2007

New Week, New Technique - Stampin' Pastels


I love quiet Sundays. I love being able to sleep in and stay in my pajamas until I absolutely have to get out of them (I'm still in them, too!). I've already taken Lucy out for a walk thru the neighborhood (I changed into jeans and then back into pj's!) and she's napping on the couch with my roommate. So while they've been napping, I've been stamping in the basement to come up with this weeks themed technique.

I'm going to use Stampin' Pastels, aka Chalks, all week on cards or scrapbook pages. I like to do chalking because it adds a nice, soft color to your project. Also, it deosn't really require any precision so you're allowed to color outside the lines! Intentionally blend or smear the chalks with your thumb for lighter color. For chalking, what you'll need for your projects are your box of Stampin' Pastels and a sponge tip applicator, cotton swab, sponge dauber or a stiff paintbrush. For today's card, I applied my chalks with a Q-tip. There are 500 in a box, so why not put them to use?!

All products used for this card are from Stampin' Up! and it is cased from the Stamper's Showcase.

Stamp sets - Along the Shore

Ink - Chocolate Chip, Night of Navy

Cardstock - Not Quite Navy, Sahara Sand, Naturals Vanilla

Accessories - Stampin' Pastels and Q-tips

Friday, March 2, 2007

Embossed Rings


Do you ever get a thought for a card or scrapbook page and have to rush off to create that thought? I got the thought to do a congratulations card last night while having dinner with a friend. We were at Border Cafe in Harvard Square enjoying margaritas and chips and watching a table of about 8 people. They were having a good time and one of the guys stood up to say something with his hand on the girl's shoulder sitting next to him. I have no idea what he said, but everyone started laughing. That little scene kind of made me think of a toast and that is the reason behind this card. The bad part was that I could not rush off to make this card because my friend and I spent the evening in Harvard Square and then I slept in late, had stuff to do today, blah blah blah. Just now I finally put my thoughts to paper!

This card was inspired by the lay-out challenge at SCS. The only images embossed in this card are the two rings from the Mini Mates stamp set. All products used are from SU!.

Stamp sets - Wild Hearts, Tagger's Dozen, Mini Mates and Warmest Regards

Ink - Cranberry Crisp, Basic Black and Versamark

Cardstock - Cranberry Crisp, Blush Blossom and Chocolate Chip

Accessories - Sterling Silver ep, Ivory organdy ribbon and Burgundy grosgrain ribbon

Thursday, March 1, 2007

Embossing with Crackled Glass Technique


I have wanted to try the Crackled Glass technique for awhile, but sometimes I get a little nervous about trying new things. I guess I'm afraid of wasting paper, even though I have about 6 large tupperware containers full of scraps!

These two cards are a combination of the color challenge and the layout challenge from SCS. I chose to use Measure of a Life stamp set because I wanted a fairly large image to emboss. I used the step-by-step instructions from the August 2006 issue of Stampin' Succes as my guide. The instructions were perfect and spot on, but my first time was not a big success.

To do the crackled glass technique just follow these easy instructions:

1. Choose a stamp set and stamp image onto cardstock. Cut your image to the size you want.

2. Use the direct to paper technique to apply Versamark over your entire image.

3. Pour Glassy Glaze Enamel Stampin' Emboss powder over your image. Shake off the extra powder into your powder pal and then heat set. (I don't have the Glassy Glaze powder so I thought I would use Crystal Clear Stampin' Emboss powder)

4. For a larger image, let your piece of cardstock to cool completely. Repeat steps 2 & 3.

5. Place your piece of cardstock in the freezer for about 2-3 minutes. (Since I had used the Crystal Clear Emboss powder, I had to leave my cardstock in the freezer a little longer)

6. Remove cardstock from the freezer and bend back and forth until you see cracks in your glaze. Bend your cardstock at different angles until you get the look you want.

There may be different ways of doing the crackled glass technique. I only chose the crystal clear powder because that is what I currently have and had some free time to play around. Next time I might try another layer or two of glaze to see what happens. I'm still happy with the cards I made and hope the recipient of them likes them as well! And always remember there is no wrong way to stamp - that's why we have buckets full of scraps!!

These cards are originals made by me and use all Stampin' Up! products.

Stamp sets - Measure of a Life and Canvas background

Ink - Elegant Eggplant, Bashful Blue, Certainly Celery and Versamark

Cardstock - Elegant Eggplant, Bashful Blue and Certainly Celery

Accessories - Celery grosgrain ribbon, Soft Subtle brads, Soft Subtle eyelets, Crystal Clear emboss powder, sponges

Tuesday, February 27, 2007

Embossing Bigger Stamps


I realize I have posted yet another thing to do with spring, but didn't I say I was behind in my scrapbooking?! These pictures were taken last summer! I had wanted to use Knobbly Gnomes with the Big Blossom, but I wasn't sure how until I started to look thru my box of 2006 photos. These photos just seemed perfect to me.

The only embossed image on my scrapbook page is the Big Blossom stamp. I wanted to show how much of a "pop" it is to use the same color craft ink as the powder you are embossing with. I chose white craft ink and white embossing powder to use on the Marigold Morning cardstock. I think that using the white craft ink with the white embossing powder is a little more of an eye catcher than if I used clear embossing powder. Maybe it's just me, but the white does make this page look a little brighter. The photos in this page came from my aunt who used to do photograhpy as a career. The flowers are grown around her house.

This page is an original created by me and uses all SU! products.

Stamp sets - Big Blossom, Knobbly Gnomes and Simply Said

Ink - White Craft Ink, Chocolate Chip, Old Olive, and SU! markers

Cardstock - True Thyme, Marigold Morning, Bravo Burgundy, Old Olive and Very Vanilla

Accessories - Metallic eyelets, Soft Subtle brads, linen thread

Monday, February 26, 2007

Embossing With Craft Ink


This card I made is cased from the demonstrator side of SU!, however I could not tell if embossing was done to it or not. And I'm not exactly sure if the scan did my card justice or not since only the saffron flower is embossed. Anywho...while Mother Nature is dumping snow into the heart of Cambridge, I still decided to showcase a Spring card with flowers. Winter came so late here that I was already preparing for Spring and Summer. Shame on me. The fresh snow is beautiful to watch.

Using craft ink to emboss is done exactly the same way if you were to use a versamark pad. Craft inks are a rich pigment ink designed for a long lasting color. I call them gooey because they are not fast drying like the standard ink pads. Tap your stamp into any color of craft ink, stamp onto cardstock, sprinkle and dump with a clear embossing powder and then heat set. Voila! Easy and beautiful!

All products used are from SU!

Stamp sets - Looks Like Spring and Everyday Flexible Phrases

Ink - Craft So Saffron, Standard Pretty in Pink and Mellow Moss

Cardstock - Very Vanilla, So Saffron, Close to Cocoa, Mellow Moss, Pretty in Pink and Spring Flowers Designer Series Double-Sided Paper

Accessories - Spring Bouquet Flower punch and gold brads

Sunday, February 25, 2007

New Technique Week - Heat Embossing


Hi there! So it's Sunday, home from NH after a long weekend and why I haven't made any recent posts. I chose to showcase heat embossing this week because it's one of my all time favorite techniques. I love watching the embossing powder turn from powder to a shimmery finish.

The top photo shows you some basic supplies that you will need. These supplies are all from SU! A heat gun, a powder pal to shake off excess powder, a Versamark pad to make your powder stick and a embossing buddy to keep static off your card. Other supplies you can use are the VersaMarker and craft ink pads.

The second photo is a card I made using silver embossing powder. This card's color scheme is cased from the Stampers Showcase on the demonstrator only site of SU! All supplies used are from SU!


Supplies used:

Stamps - In the Wild and Sincere Salutations

Cardstock - Real Red and Whisper White

Inks - Versamark pad

Accessories - Silver heat and stick powder and Fancy Fibers

Thursday, February 22, 2007

Scrappin' Friends


Splitcoaststampers is a treasure chest filled with inspiring people who create jaw-dropping pieces of art every single day. I call myself a Queen Caser because I don't have very many original thoughts in this empty head, but I sure can case (Copy And Share Everything) like its nobody's business!!


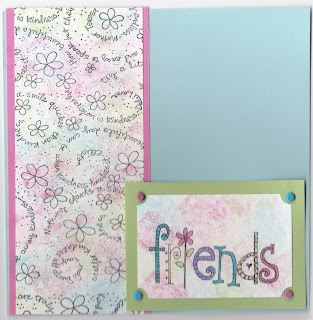
I have a workshop this weekend where the hostess asked me to demo a 6x6 page and these are the 2 I came up with the help of SCS. The first one is a not so over the top of the second page. I loved how marthaunplugged used the Kindness wheel as the background for her card and then colored in random flowers. I used her idea on page 2, but then I added some sponging to create a tye-dye kind of look. I used a sponge to add certainly celery, cool caribbean , and regal rose. These colors, btw, are courtesy of emilymomto3boys who does the color combo challenge every week at SCS.


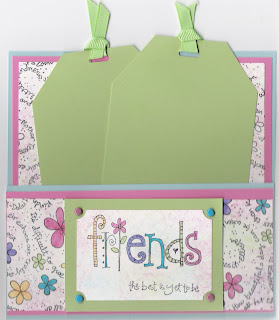
The second page I came up with is cased from NurseT. I especially liked how she made her page a pocket so that you can add more than 1 photo. I did the tye dye sponging again.


These pages are creatively cased and hopefully I gave proper credit where credit is due!! And all products used are from SU!
Stamp sets - Love Matters, SA Jumbo Kindness wheel
Ink - Basic Black, Certainly Celery, Regal Rose, and Cool Caribbean
Cardstock - Certainly Celery, Regal Rose, Cool Caribbean, and Whisper White
Accessories - Ticket Corner punch, Rich Regal brads, Bold Brights brads, celery grosgrain ribbon, and SU! markers

Wednesday, February 21, 2007

Joyful Winter


I saw this stamp at AC Moore and just had to have it. It reminded me of a young couple in love and getting their first Christmas tree. The silhouette stamp is from http://www.stampendous.com and the Night of Navy cardstock is cut with Paper Shapers to add a cute border. I used the Bold Snowflake wheel as a background and added dazling diamonds glitter for a little sparkle.


This card is an original card by me.

Stamp sets - silhouette image from Stampendous, Small Script and Bold Snowflake SA wheel(both from SU!)

Ink - Night of Navy, Brocade Blue SA ink cartridge

Cardstock - Brocade Blue, Night of Navy and Whisper White

Accessories - Dazzling Diamonds glitter(SU!), and paper shapers scissors

Tuesday, February 20, 2007

Smilin' in Dallas


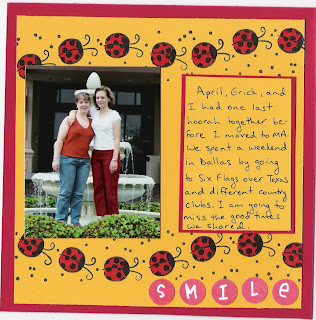
This is probably one of my first 6x6 scrapbook pages that I ever made as a demonstrator. It is very plain with no embellishments, but it still came out nicely. This is me with my friend April. We and her husband had taken a trip to Dallas tohang out together one last time before I moved to MA. We went shopping at the Galleria Mall, went to Six Flags Over Texas and hit a couple of country clubs for some nighttime entertainment. A fun day with lots of laughs is the very best to have with friends!

This page is an original made by me and uses all SU! products.
Stamp sets - Alphadots and Ladybugs SA wheel
Ink - Basic Black ink cartridge, Real Red
Cardstock - Real Red, Summer Sun, Whisper White

Monday, February 19, 2007

Kindness in Thank You's


Before I put my Kindness wheel back in its safe little plastic storage case, I wanted to make one more card. This card, I believe, is a case from SU!. I tried to find the card SU! put on their website, and to no avail I could not. I do remember they used the frog from Very Punny and shades of green and brown/gray. I used Taggers Dozen instead because I wanted to show my friends what else they could match up their winter sets to.


This card is a thank you that I will use because it was easy and versatile to make.

Stamp sets - Taggers Dozen and Kindness wheel

Ink - SA cartridge Ballet Blue, markers in basic black and Rose Red

Cardstock - Rose Redk, Ballet Blue, So Saffron

Accesories - Basic eyelets, Regal Rose brads, horizontal slot punch, Tag punch, Small tag punch, Bluebird grosgrain ribbon

Sunday, February 18, 2007

A Wheel of a Good Time!


So now that I have kept this blog going for a whole week, I thought I would change it up a little and be faithful about posting. Unless, I'm out of town, sick, yadda yadda. Each week I'm going to pick a technique and use it in either a card, scrapbbok page or some sort of 3-D item and post those each day! To start off this week I've chosen to use Stampin' Around wheels. Using wheels as a background or an accent is fun and versatile. SU! makes this super easy because they off self inking cartridges that pop right into the wheel handle and keept your wheel inked while you're using it.


All products used in this card are fromSU!

Stamp sets - Simply Said and S.A. Kindness wheel

Ink - Basic black, Lovely Lilac S.A. ink cartridge, and markers in Lovely Lilac, Apricot Appeal and Certainly Celery

Cardstock - Lovely Lilac, Certainly Celery, Apricot Appeal, Whisper White

Accessories - Celery grosgrain ribbon


FYI - If their is a technique you would like to see, please leave me a comment and I'll do my very best to showcase it for an entire week!


Big Thank You!!

I just wanted to say THANK YOU to all of you who encouraged me to sart this blog, kept checking in and left comments!!!! This has ben the first whole week of my new blog and I hope their will will be many more weeks to follow!!

Thursday, February 15, 2007

Think Spring!!

Here in MA it is so cold that I had to sit down and scrap a spring page! This is my younger cousin Lena with her hamster, "Cocoa Puff". Cute, aren't they?!
This page lay-out is cased from a Splitcoaststampers challenge (SBSC 62). All products used are fromSU!
Stamp sets - Bunny hugs (from new Spring mini), Headline Alphabet and Brushstroke Alphabet
Ink - Old Olive and Tempting Turquiose
Cardstock - Barely Banana, Old Olive, Certainly Celery and the Petals and Paisleys Designer Series Double-sided paper (also from new Spring Mini)
Accessories - Celery grosgrain ribbon, Spring Bouquet Flower punch and mini glue dots

Wednesday, February 14, 2007

Happy Valentine's Day!!


Some people think of Valentine's Day as a Hallmark Holiday and others think of it as a day to spend with their one and only. I have friends who have their anniversaries on this date and others who have their infamous break-ups on this same day. Valentine's Day has never been one of those special days to me. After all, I have yet to meet my one and only! Although, my very wonderful roommate did get me some very beautiful tulips to put on the hutch in the living room. He is a sweet guy if nothing else! LOL!! These two cards are what I put together to mail to a few special people in my life!
These cards are an original made by me. All supplies used are from Stampin' Up!
Card 1 - Stamp sets - Wild Hearts and Tagger's Dozen
Ink - Real Red and SU! markers
Cardstock - Real Red, Basic Black and Whisper White
Accessories - Tag punches (both small and regular), basic eyelets, silver cord, Red wide organdy ribbon
Card 2 - Stamp sets - All Mixed Up and Beyond the Basics
Ink - Rose Red and SU! markers
Cardstock - Rose Red, Pretty in Pink and Naturals White
Accessories - Ticket Corner punch and Soft Subtle brads


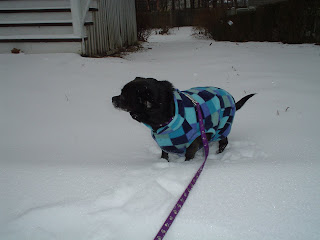
I just came home from my overnight shift as an x-ray tech at Mt. Auburn Hospital and the weather is definitely crummy! There might be a half inch of snow, but right now it is snowing with a combo of freezing rain. The roads are getting plowed, but I drove home in muddy gray slush. Yuck!! Thought I would share some pics of my 8-year-old Lucy girl in her winter sweater. She's a mix of pug and dachsund. I like to call her a pugsund!

Monday, February 12, 2007

My Geishas


I don't know what fascinated me more about watching "Memoirs of a Geisha". The beauty of of the Japanese culture, the rivalry of the up and coming geishas or the two sisters being torn apart from each other and never really knowing who they are. Whatever it was, I was completely drawn into that movie. A friend let me borrow her book knowing I will definitely enjoy that more, but I still haven't sat down long enough to start reading it.

I saw this stamp at AC Moore a couple of weeks ago and just had to have it. So I made a standard 4 1/4 x 5 1/2 card so I could have a couple of plain notecards laying around should I need one. My roommate sees them and says they don't have the pizzaz that my cards usually do. I took this as not having any ribbon, brads, glitter, etc. So I woke up one morning at 4 am with that card on my brain and had to make a 6x6 card that would have a lttle of my pizzaz.


These cards are an original done by me.

Stamps - Kanji from Stampin' Up! and the Geisha from AC Moore (www.limitededitionrs.com is the site listed on the stamp itself)

Ink - basic black, markers from SU!

Cardstock - from SU! - whisper white, basic black, real red and garden green and the patterned paper is scraps from a mat stack

Accessories - gold cord

Sunday, February 11, 2007

Birthdays should always be special!


I just finished making this card for a special boy I have never and possibly will never meet. Why would I do this you ask? Back in November, I signed up through SU! to be a volunteer with Ronald McDonald House Charities. Our group of stampers is under the leadership of Barbara L. and what we do is go to the chapter house in Brookline to cook dinner for families who come from other states and countries to be with their children who are being treated at area children's hospitals. Please visit the link on the side to learn more about making the difference in the lives of children.


So getting back to what I started to say...I have only been able to participate in one night of cooking so far. I missed the last dinner and a little boy commented on how much he liked their applesauce. So Barbara L. thought he would get a kick out of all of us sending him birthday cards as a surprise! Of course the parents know about this since their boy will be getting 30-50 birthday cards from strangers. And we're all signing the card "From a member of Jamie's Applesauce Crew"! I wish I could be there to see his face light up when he gets all of his cards!
This card is an original by me and is made using all SU! supplies.
Stamps - All Mixed Up, It's Your Birthday, Spot On wheel
Ink - Basic black, Old Olive ink cartridge and markers
paper - Brilliant Blue, Gable Green, Yoyo Yellow and Confetti White
Accessories - silver cord, bold brights brads, ticket corner punch

Saturday, February 10, 2007

Behind in my scrapbooking


I worked on this 2 page lay-out last night. I'm so far behind in my scrapbooking - these photos are from October 2006! My roommate and I took a vacation to Austin, TX. It was mostly to see the sights, he had never been and friends of ours recommended Austin as a place to see. Austin was a great city. We had alot of fun there, especially downtown on 6th Street!
This lay-out has all SU! supplies except where noted.
Stamps - Love Matters, from Winter mini
Inks - Basic Black ink pad, all SU! markers
Paper - all paper is from the Simply Scrappin' Just Delightful kit from Sell-A-Bration mini
Accessories - Prima flowers, from SU! - soft subtle brads, cream grosgrain ribbon

Jumpin in!


Well, I decided to go ahead and start a blog. Many of my friends have their own web pages and since many of us live in different cities and states, I thought I would do the same.


I truly am a basement stamper. I moved to Cambridge the week before Thanksgiving and the only space in the house for my ever-growing compilation of stamps and scrapbooking stuff was in the basement. It is a finished basement and I share my space with my roommate's gym equipment, but that's ok. I have enough space.


These photos were taken about 2 weeks ago. I feel embarrased and ashamed to say this is how I've been stamping and scrapping for the last 3 months. I got too busy over the holidays and just didn't take the time to get my space set-up the way I wanted to and before too long it turned into this colossal mess! Last weekend I finally plunged into the mess and started what is going to be an on-going decorative challenge.

What season are you?

You Belong in Spring
Optimistic, lively, and almost always happy with the world... You can truly appreciate the blooming nature of spring. Whether you're planting flowers or dyeing Easter eggs, spring is definitely your season!